
This generation has people that are absolutely obsessed with losing weight. Instead of the traditional workout plus healthy diet, many folks have resorted to desperate moves to rid themselves of unwanted pounds. Fad diets have come and gone—juicing for days that supposedly detox and expel all the toxins in your body; specialized meal plans that avoid a certain kind of food like meat, rice, sweets, processed food, dairy products; and many, many more. Unique workouts have also come to the fore, each promising fast results in just days with intense sets of exercises over a short amount of time. You’ve got
360 circuit training, the T3 workout, Insanity, Crossfit, and others. This is also the generation that popularized insane body-image trends like “sex cuts” the thigh gap, and protruding collarbones. For guys, having Apollo’s belt, 6-pack abs and huge arms all contributed to making many personal trainers rich.
Admit it or not, not all of us are blessed with the perfect hourglass figure or ideal vital statistics. While working out and dieting works, there is a one sure slimming regimen that will just take you at least five minutes to get the dream body that you want—Photoshop.
Today, we will show you how you can alter the specific target areas of “excess baggage” in the most common problem areas: the face, legs, stomach, and arms.
For the face:
1. Open the chosen picture in Photoshop, determine which area of your face you would like to reduce.
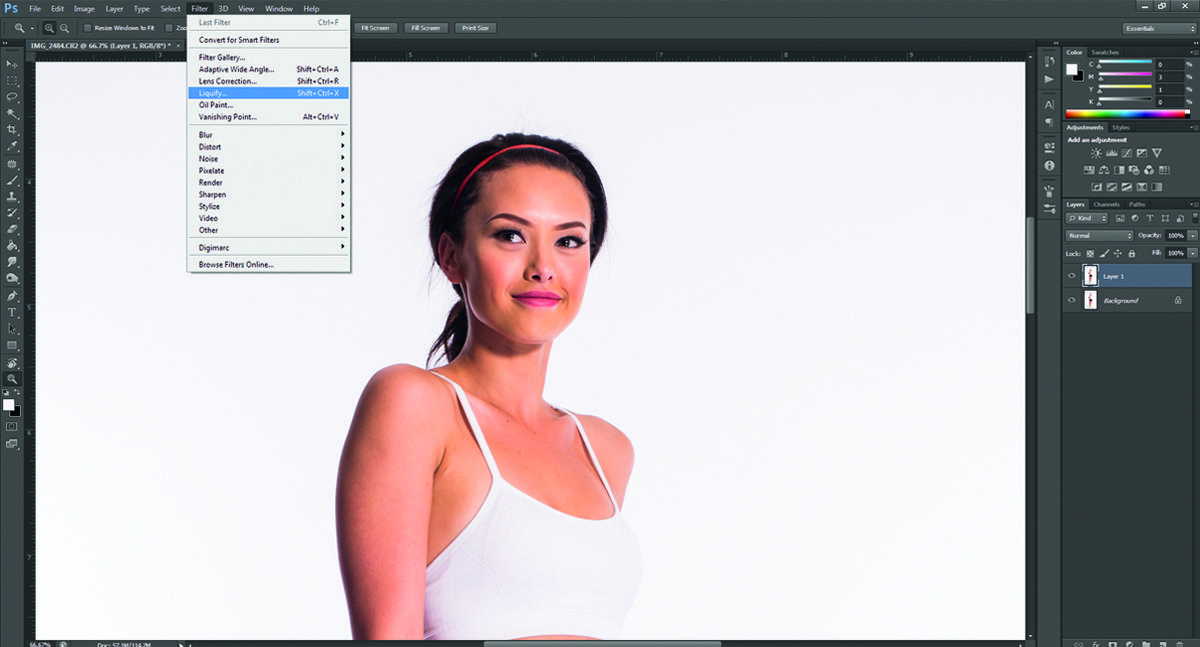
2. Click “Filter,” followed by “Liquify,” and then hit the “Forward Warp” tool, typing 150 in the “Brush Size” text box. Remember, the number you put in the Brush Size textbox will be the size of the tool in pixels. Click a point on the outside of the face, then hold and drag the cursor moving inward to make the face narrower. Repeat the process until the desired size is obtained.
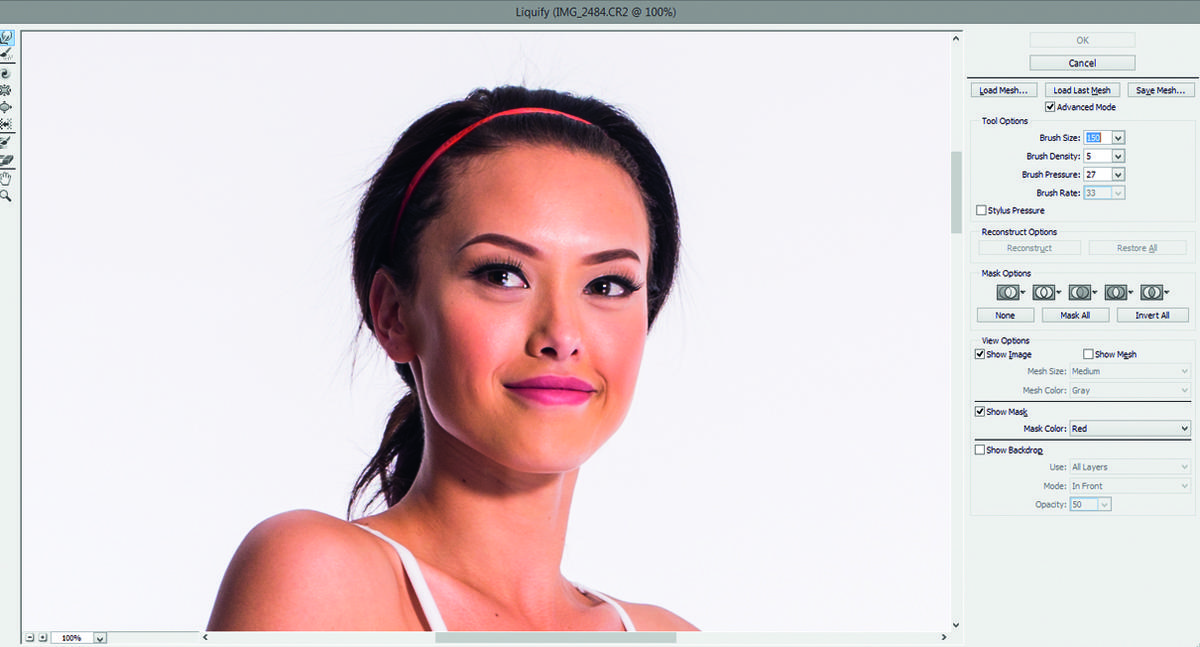
3. Remember to check the dimensions (and the background) to avoid having obvious discrepancies in the picture.
It is pretty much the same procedure for the legs, stomach, and arms, just don’t forget to alter the background of the picture to avoid the telling appearance of curved walls or floors.
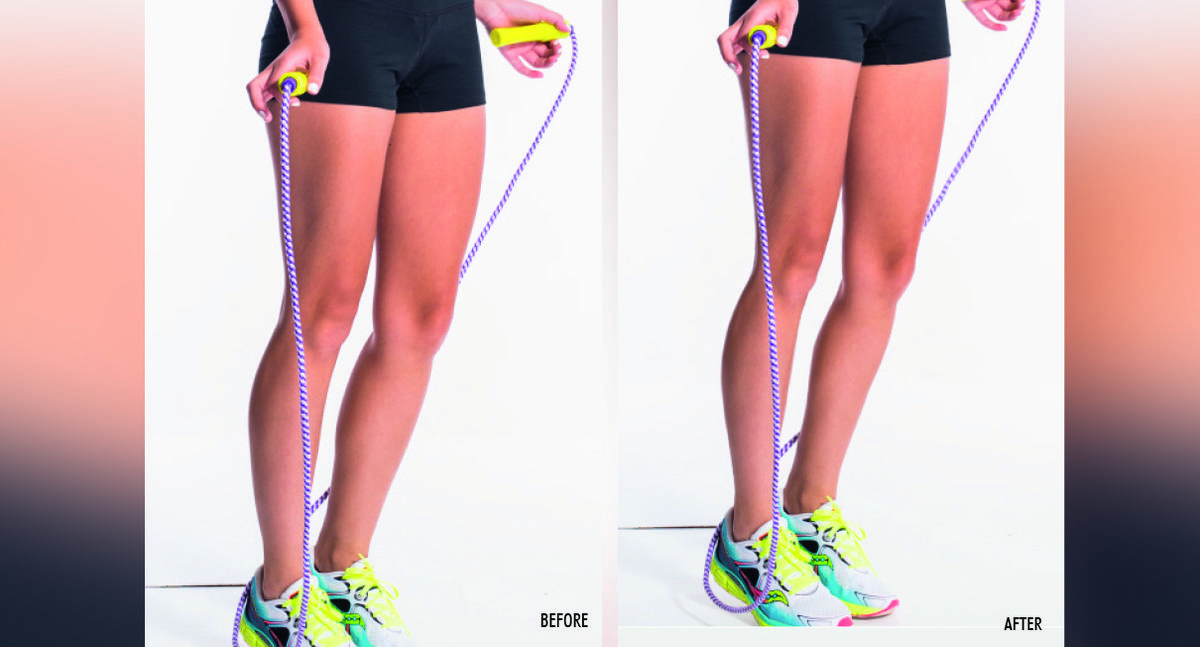
For the legs, stomach, and arms:
1. Open the chosen picture in Photoshop.
Next, duplicate the background layer by
clicking Layer > Duplicate layer.
2. Click “Filter,” followed by “Liquify.” Position the cursor against your waistline or the outermost part of your leg or arm, then click the left mouse button, hold and drag the mouse directing inward toward the center part of your stomach, arm or leg to make it appear slimmer. Just like the procedure in slimming your face, you can adjust the brush size and pixels.
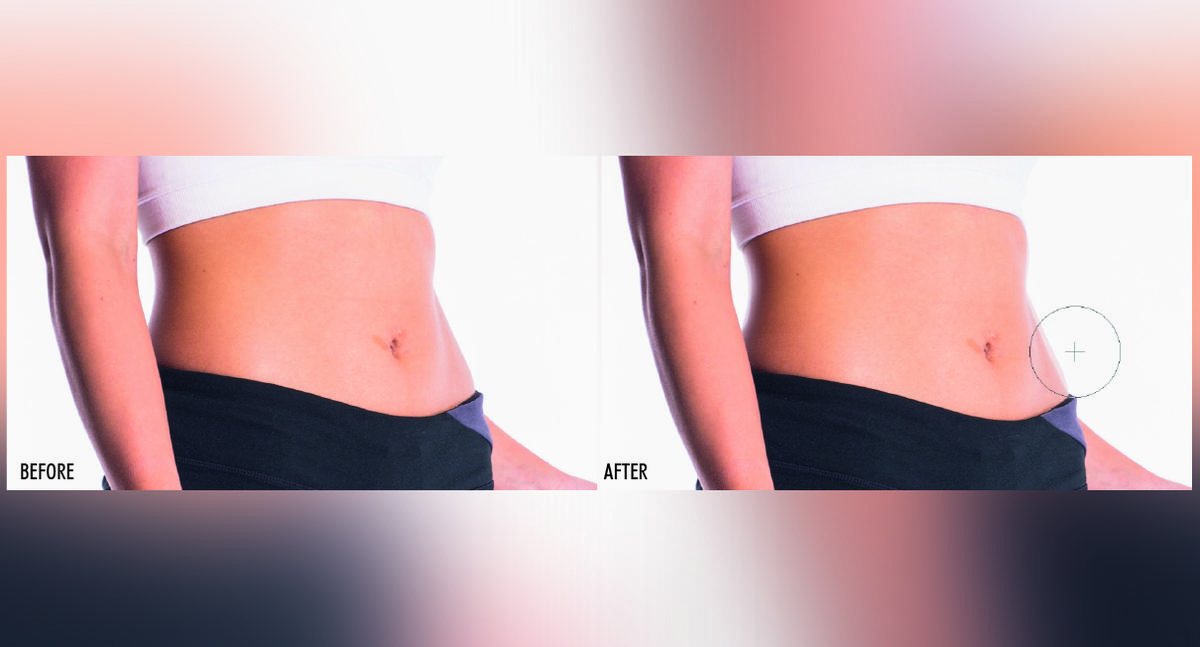
3. In case you end up pulling your background and causing it to curve unnaturally, use the clone tool to clone the part of the background that is not affected by the distortion to make it seamless.
Also published in October 2015
Words by Jonah Mendoza